Build an AI-Powered Security Camera with ESP32-CAM
This tutorial shows you how to turn a low-cost ESP32-CAM into a smart front-door security system with live video, motion detection, snapshots, phone alerts, and a Home Assistant dashboard.
You are not building a toy camera. You are building a real smart-home security node: ESP32-CAM captures the video, Home Assistant organizes the dashboard and automations, and your phone receives alerts when motion or a known face is detected.
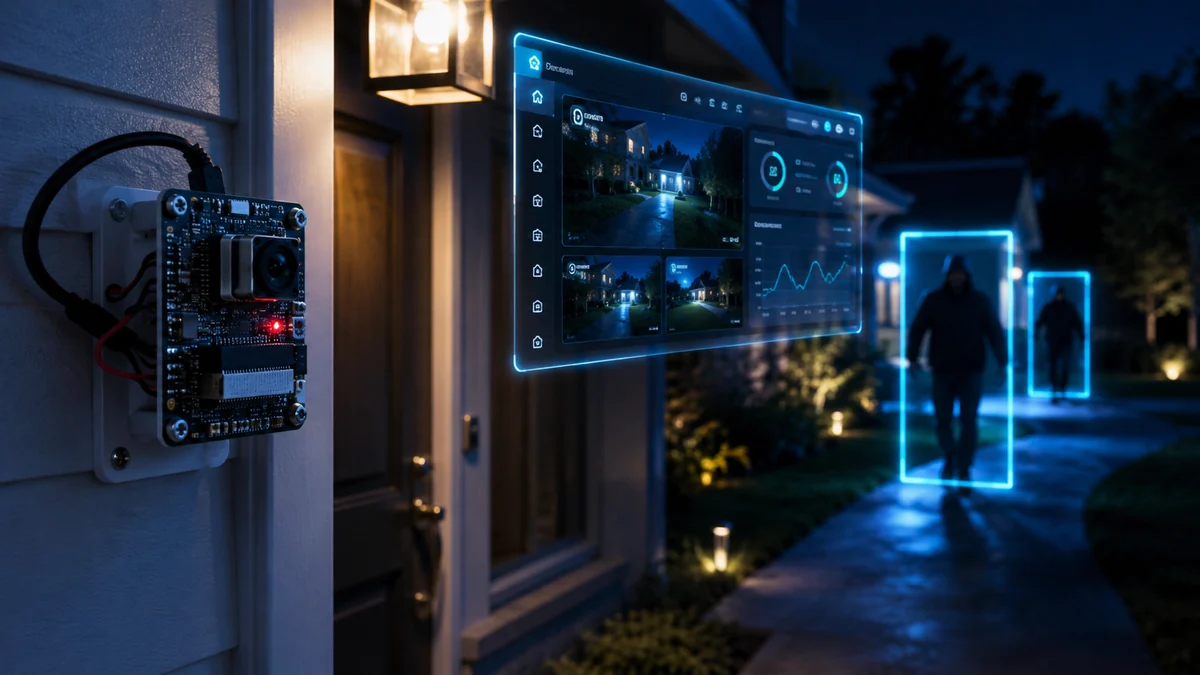
Live front-door cameraView your ESP32-CAM stream from your local network or Home Assistant dashboard.
Motion-triggered snapshotsUse motion detection to capture useful evidence instead of recording useless empty footage.
Face detection workflowUse ESP32-CAM face detection concepts or upgrade later with a stronger AI server.
Mobile notificationsSend a front-door alert with a snapshot so you know what happened fast.
Reality check: ESP32-CAM is powerful for the price, but it is not a $300 AI camera. Keep expectations sane: use it for learning, local monitoring, snapshots, and smart-home automation. For heavy AI recognition, let Home Assistant, Frigate, or another local server do the harder work.
Parts List
These are the core parts for the build. Some links below are Amazon affiliate links, which may help support WolfieWeb at no extra cost to you.
ESP32-CAM module
Main camera board with WiFi and OV2640 camera. This is the brain and camera for the project.
Upgrade option: Want a finished consumer-style version of this idea? Compare AI doorbell cameras here: View AI doorbell cameras on Amazon.
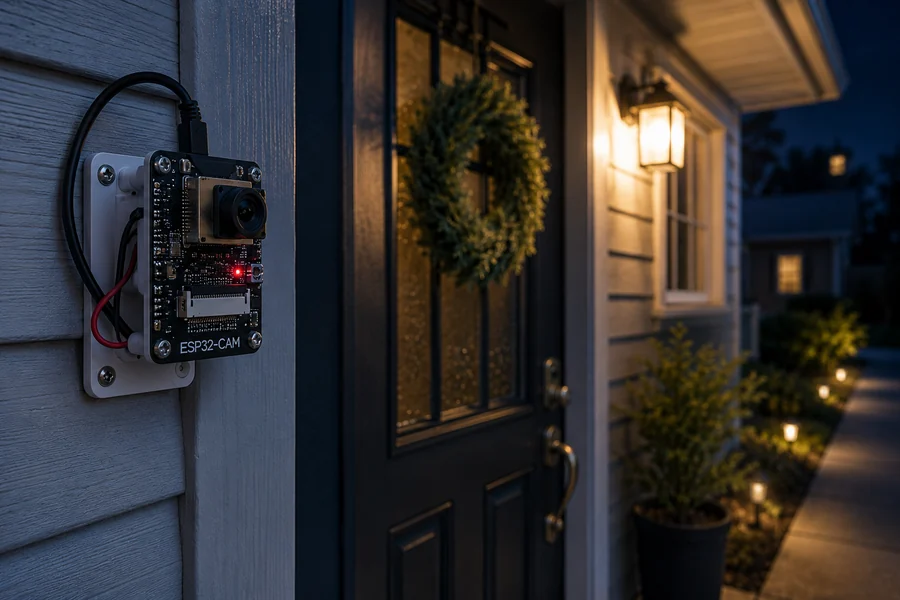
Step 1: Mount the ESP32-CAM Near the Door
Place the camera where it can see faces clearly: about chest to head height, angled slightly downward, and close enough to the porch light to avoid muddy night footage.
Front-door install concept: mount the board securely, protect it from rain, and keep the lens aimed at the walkway.
Important: Do not leave a bare ESP32-CAM exposed to weather. Use a small enclosure, seal cable entry points, and keep the board dry.
Step 2: Wire the ESP32-CAM
The ESP32-CAM has no built-in USB port, so you normally flash it with an FTDI adapter. During flashing, GPIO0 is connected to GND. After flashing, remove that GPIO0-to-GND jumper and reboot the board.
Wiring diagram for flashing, powering, and adding a PIR motion sensor trigger.
Connect FTDI 5V to ESP32-CAM 5V and FTDI GND to ESP32-CAM GND.
Connect FTDI TX to ESP32-CAM U0R and FTDI RX to ESP32-CAM U0T.
For flashing only, connect GPIO0 to GND before pressing reset.
Connect PIR VCC to 5V, PIR GND to GND, and PIR OUT to a safe input pin such as GPIO13.
Step 3: Flash the Camera Firmware
The simplest starting point is the ESP32 CameraWebServer example from the Arduino IDE. It gives you a working live stream first. Once the stream works, then you can add Home Assistant and automations.
Install the Arduino IDE.
Add ESP32 board support in Board Manager.
Select an ESP32-CAM board profile such as AI Thinker ESP32-CAM.
Open the CameraWebServer example.
Enter your WiFi name and password.
Upload while GPIO0 is connected to GND.
Remove GPIO0 from GND, press reset, and open the serial monitor to find the camera IP address.
// Basic ESP32-CAM idea
// 1. Connect WiFi
// 2. Start camera server
// 3. Visit the board IP address in your browser
// 4. Add that stream to Home Assistant
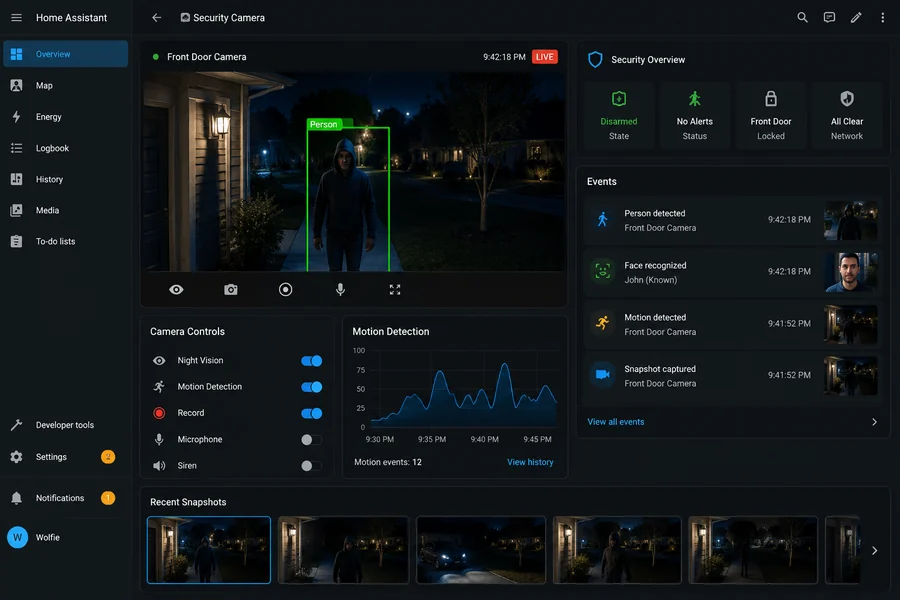
Step 4: Connect the Camera to Home Assistant
Once the ESP32-CAM is streaming on your local network, Home Assistant becomes the control center. Your camera feeds the dashboard, automations watch for events, and your phone gets alerts.
Network flow: ESP32-CAM sends video through WiFi to the router, Home Assistant reads the stream, and your phone receives alerts.Home Assistant dashboard concept with live view, motion events, recent snapshots, and camera controls.
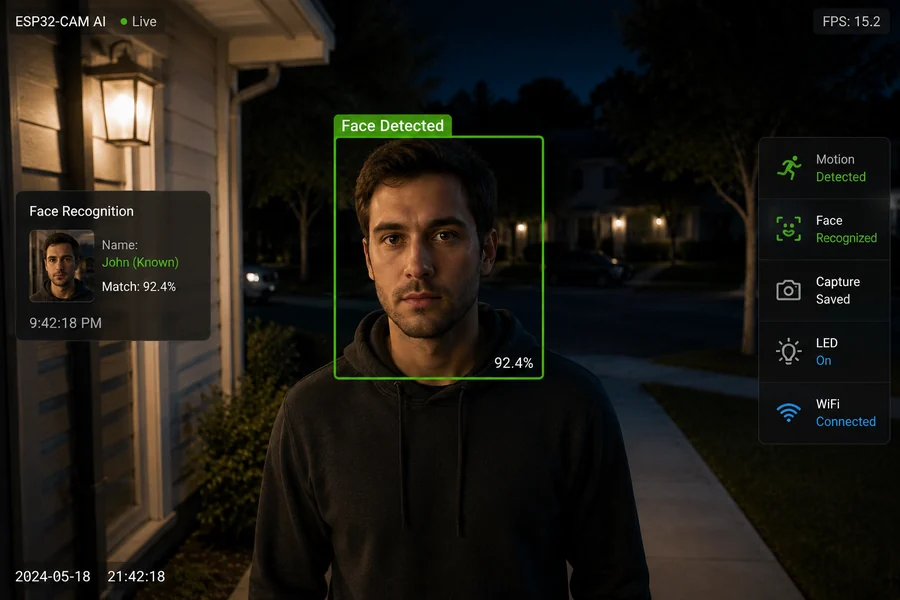
Step 5: Add Motion and Face Detection Logic
For a beginner-friendly build, start with motion detection. Then layer in face detection. The smart way is simple: motion wakes the workflow, face detection checks the frame, and Home Assistant sends the alert.
Detection workflow: motion starts the event, face detection checks the scene, alerts go out, snapshots are saved, and storage keeps the history.Face detection in action: the system flags a face, labels the event, and prepares a snapshot for review.
Privacy note: Use face recognition responsibly. Keep processing local when possible, avoid recording public areas, and follow local laws before pointing cameras at sidewalks, neighbors, or shared spaces.
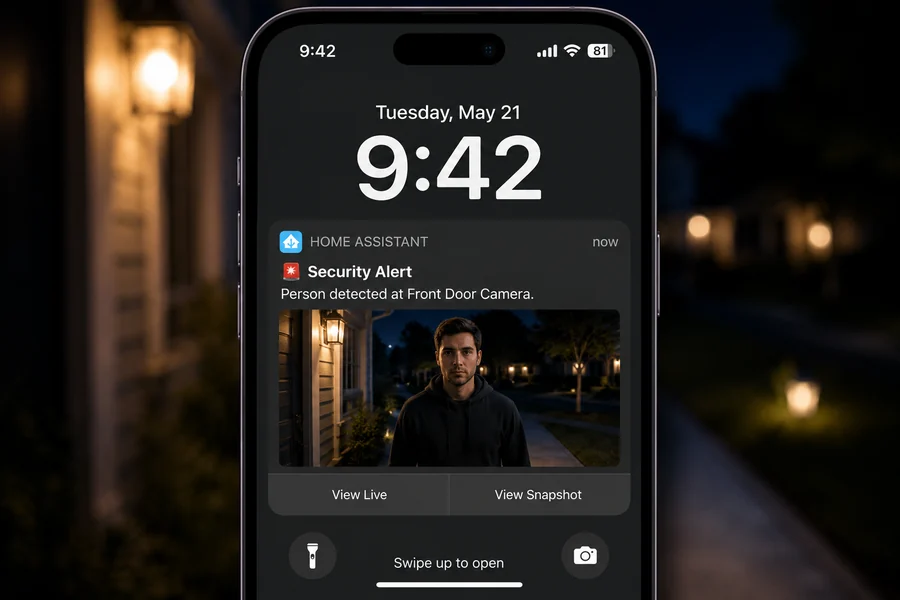
Step 6: Send Phone Alerts with Snapshots
The best security alert is not just “motion detected.” It should tell you where it happened and show you a snapshot. That is what turns a basic camera into a useful smart-home device.
Phone notification screenshot style: person detected, camera location, snapshot preview, and quick action buttons.
alias: Front Door Camera Alert
trigger:
  - platform: state
    entity_id: binary_sensor.front_door_motion
    to: "on"
action:
  - service: camera.snapshot
    target:
      entity_id: camera.front_door_esp32
    data:
      filename: /config/www/front_door_latest.jpg
  - service: notify.mobile_app_your_phone
    data:
      title: "Security Alert"
      message: "Person detected at the front door."
      data:
        image: /local/front_door_latest.jpg
Step 7: Save Snapshots and Build an Event History
Do not rely only on live view. Save snapshots when events happen. Keep the newest image for notifications and archive important events to Home Assistant storage, a NAS, or cloud sync.
Create a folder for camera snapshots.
Use timestamped filenames so old events are not overwritten.
Keep a low-resolution version for mobile alerts.
Delete old snapshots automatically after a set number of days.
Helpful Embedded Videos
These three videos use direct YouTube embed URLs from the exact links you provided, so the lightbox opens the selected video instead of a search playlist.
Video 1: ESP32-CAM setup
Use this first video to help readers get the ESP32-CAM ready, powered, connected, and streaming.