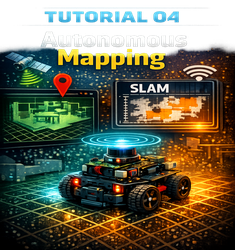
Tutorial 04 — Autonomous Mapping NEW
Ultrasonic scanning + basic grid mapping

Make Your Robot Choose Where To Go
This lesson upgrades your robot from reactive obstacle avoidance to basic autonomous navigation. Your bot sweeps an HC-SR04 ultrasonic sensor on a servo, converts distance readings into a simple map, then chooses the clearest direction.
Safety: HC-SR04 ECHO is 5V. Use a voltage divider / level shifter before Raspberry Pi GPIO.
Outcome: a working scan → decide loop you can plug into your motor drive code from Tutorial 01.
Left / Forward / Right decisions based on the maximum open distance.
Tip: Start with the sensor mounted solidly. A loose ultrasonic/servo mount will give noisy readings.
Parts List
- Raspberry Pi robot chassis (from Tutorials 01–03)
- HC-SR04 ultrasonic sensor
- SG90 servo motor (for scanning)
- Breadboard + jumper wires
- Voltage divider (recommended 1k + 2k) or logic level shifter for ECHO
Wiring
Suggested GPIO (BCM)
- TRIG → GPIO23
- ECHO → GPIO24 (through voltage divider / level shifter)
- Servo signal → GPIO18 (PWM)
- VCC → 5V, GND → GND
Voltage divider quick note: ECHO (5V) → 1k (top) → junction → 2k (bottom) → GND. The junction goes to GPIO24.
How The Mapping Loop Works
- Servo sweeps angles (example: 30°, 60°, 90°, 120°, 150°).
- Ultrasonic returns distances at each angle.
- Distances are saved to a simple array (starter model).
- Robot picks the direction with the largest open distance.
Next, we’ll expand this into a real occupancy grid and add position tracking.
Python Starter Code
Download mapping.py below and run it on your Pi. It prints sweep distances and the best direction. Then integrate the best direction into your motor control code (Tutorial 01).
Tutorials in Video Format
These help you visualize servo scanning, mapping basics, and what SLAM is building toward.